Follow the steps below to reduce photo size using the Gallery app on android phones. For this post, we will resize an image to modify the resolution and reduce the size.
Step 1: Open the Gallery app on your phone.
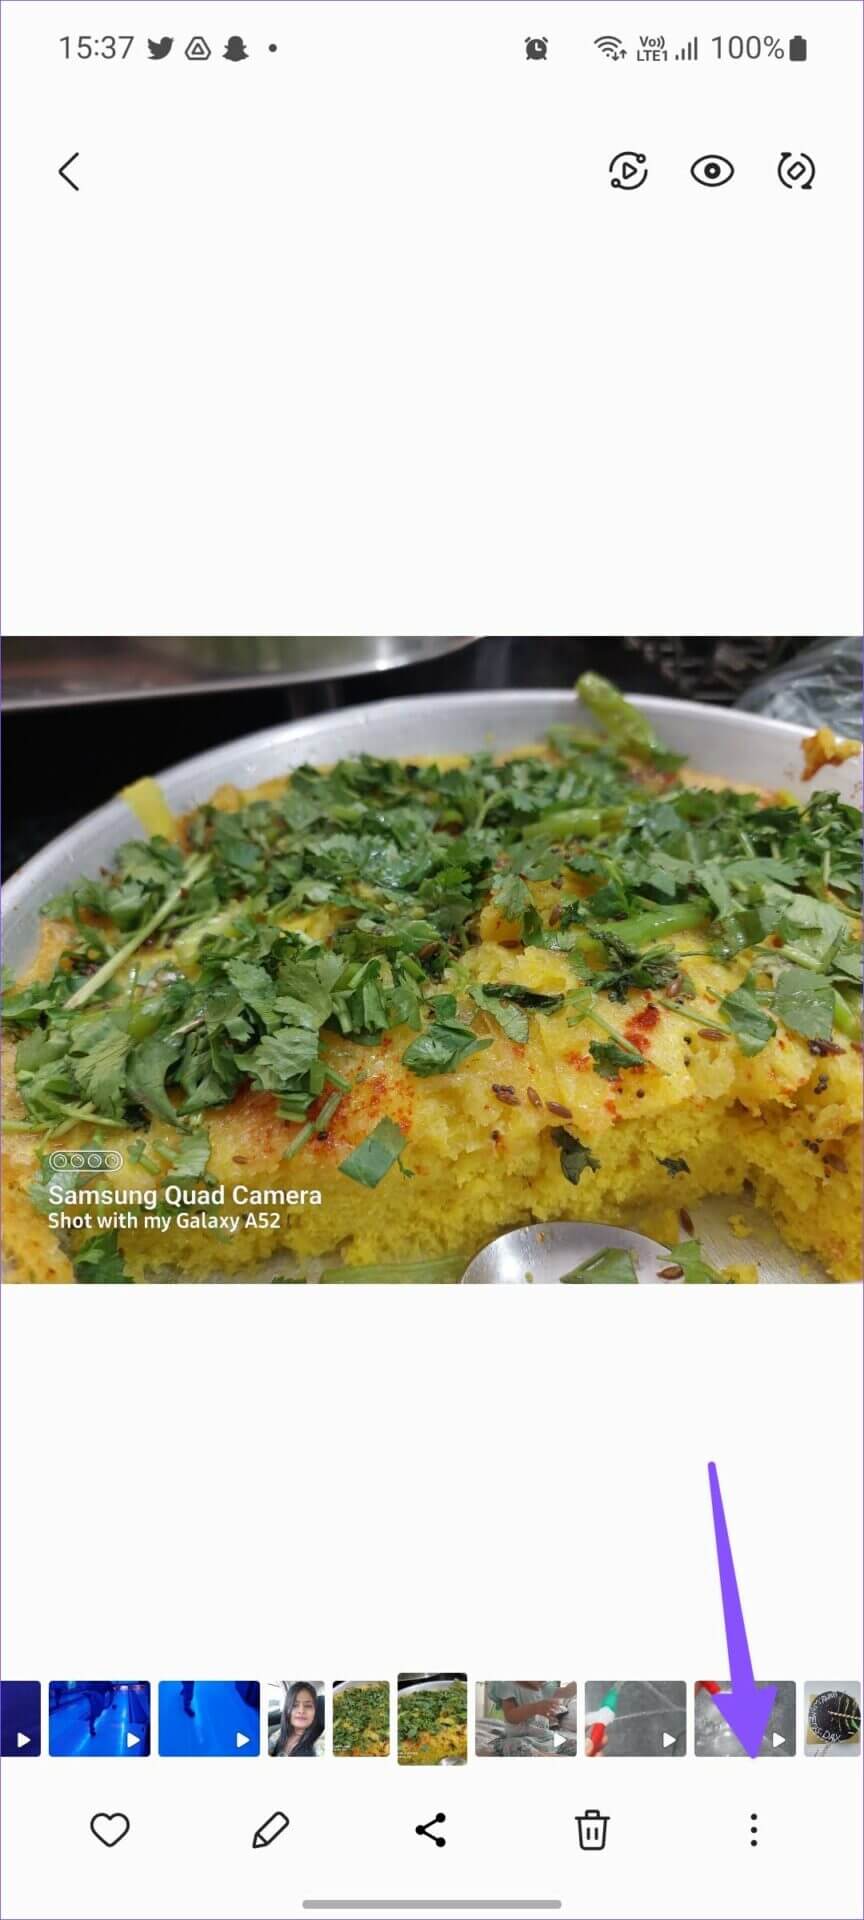
Step 2: Open the image you want to compress.
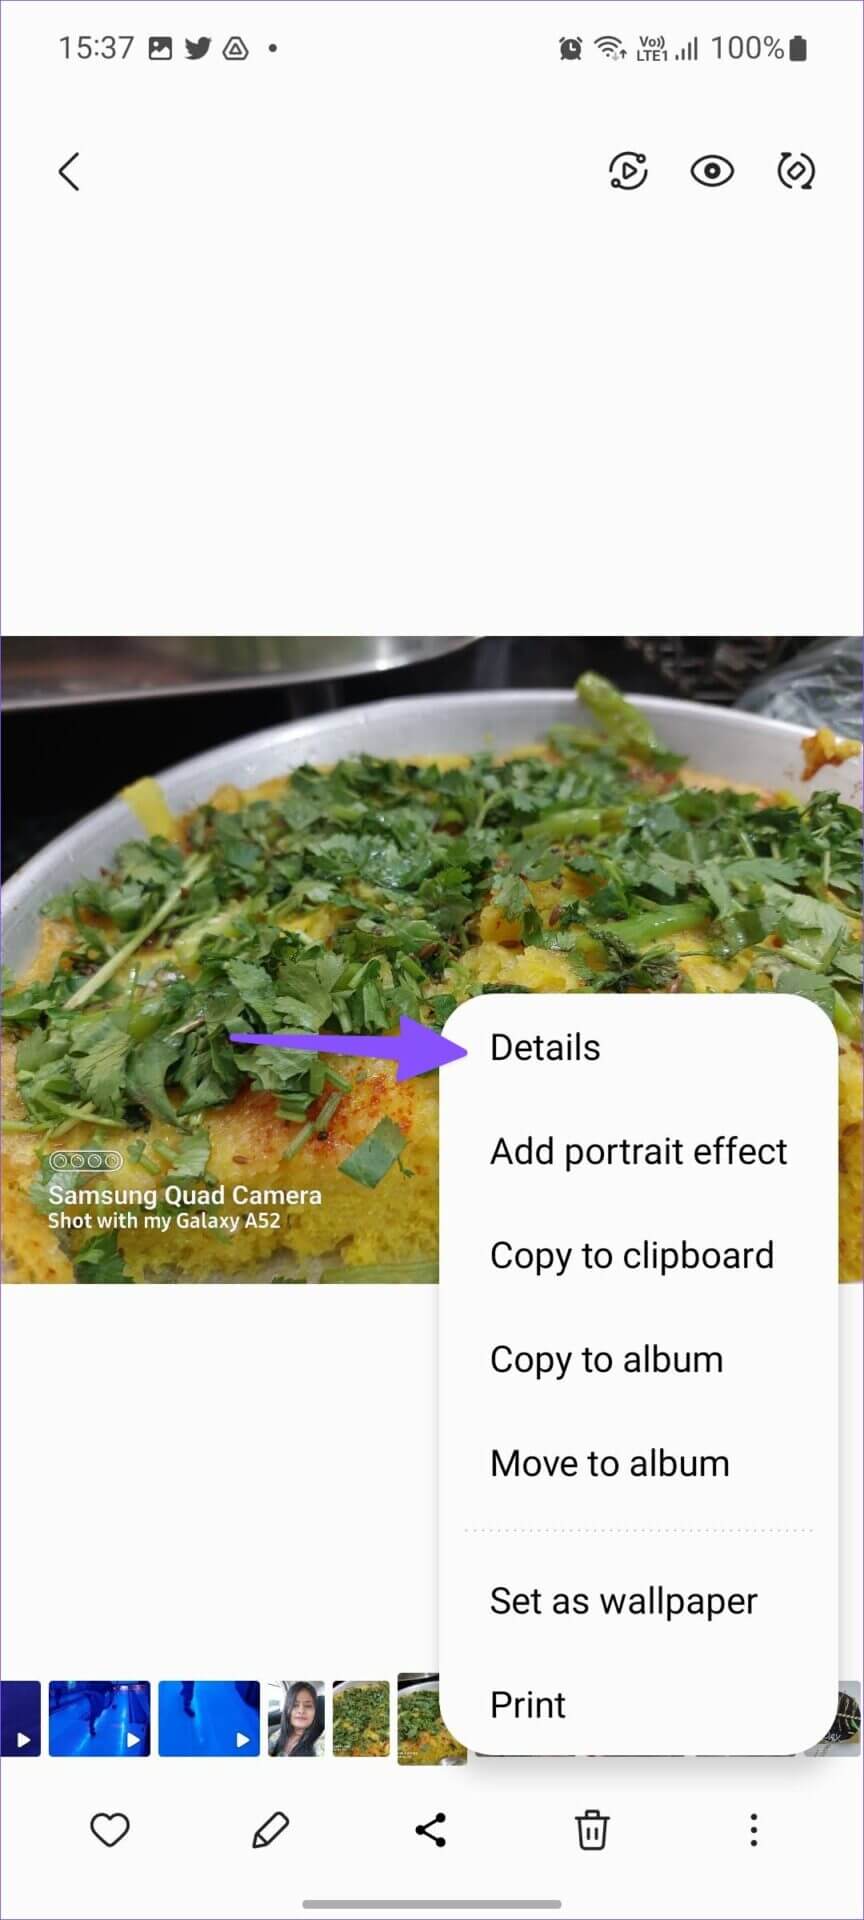
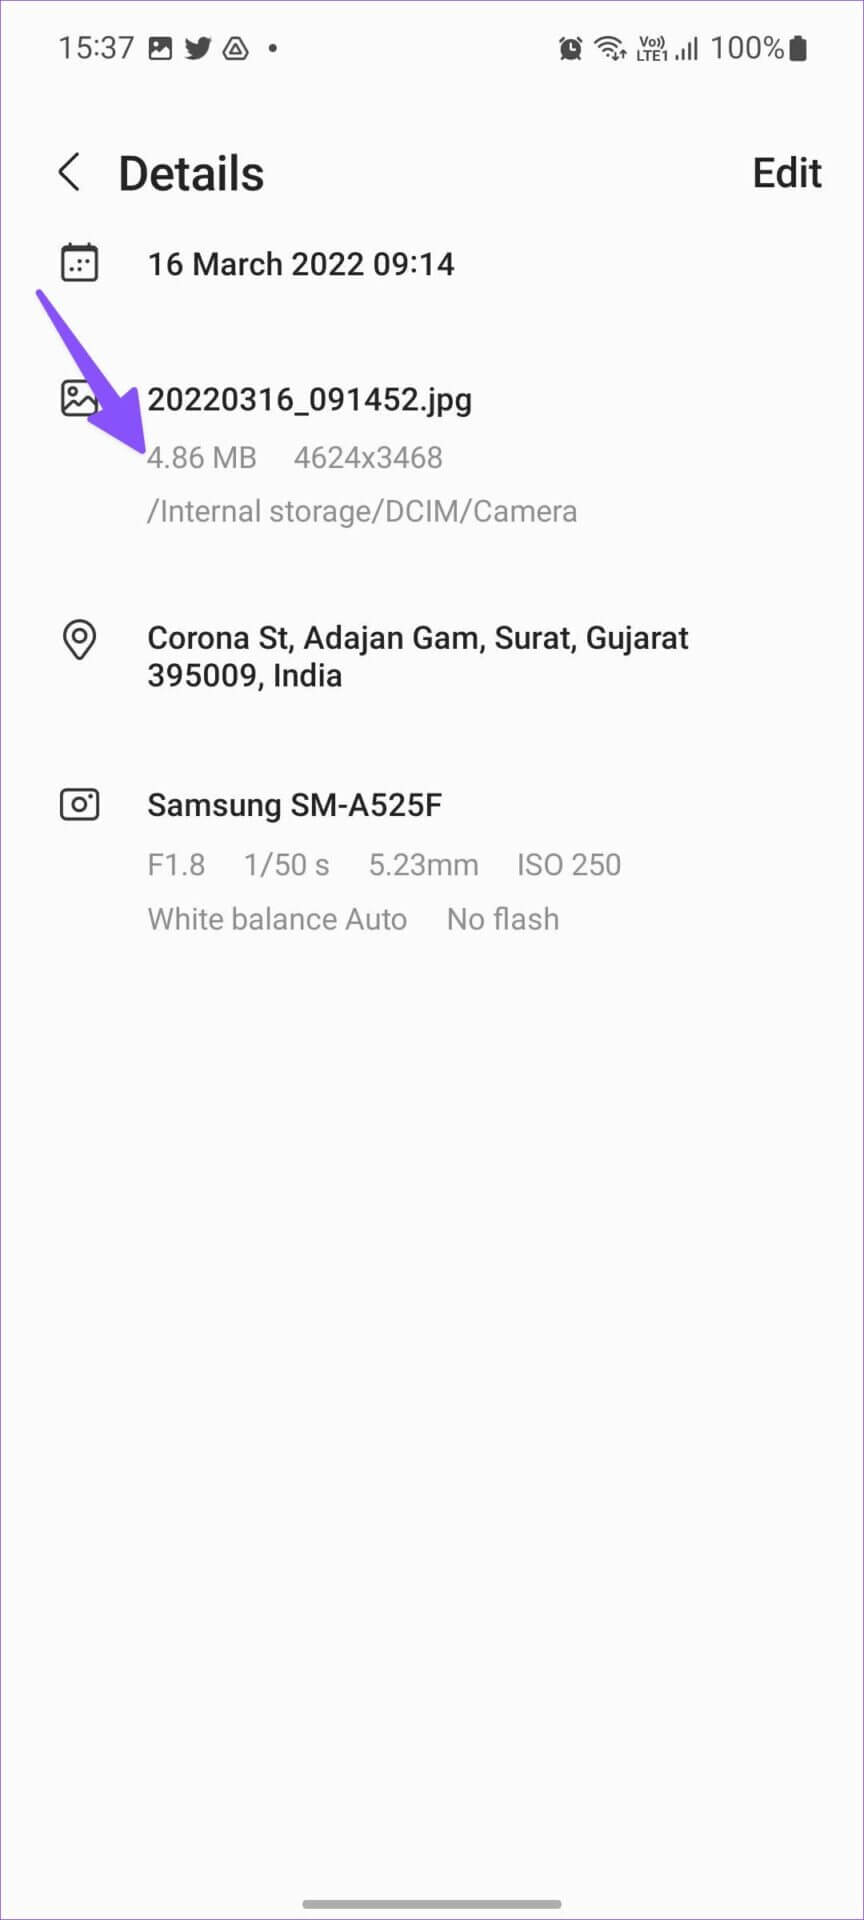
Step 3: Tap the three-dot menu in the bottom-right corner and select Details to check the current image size.
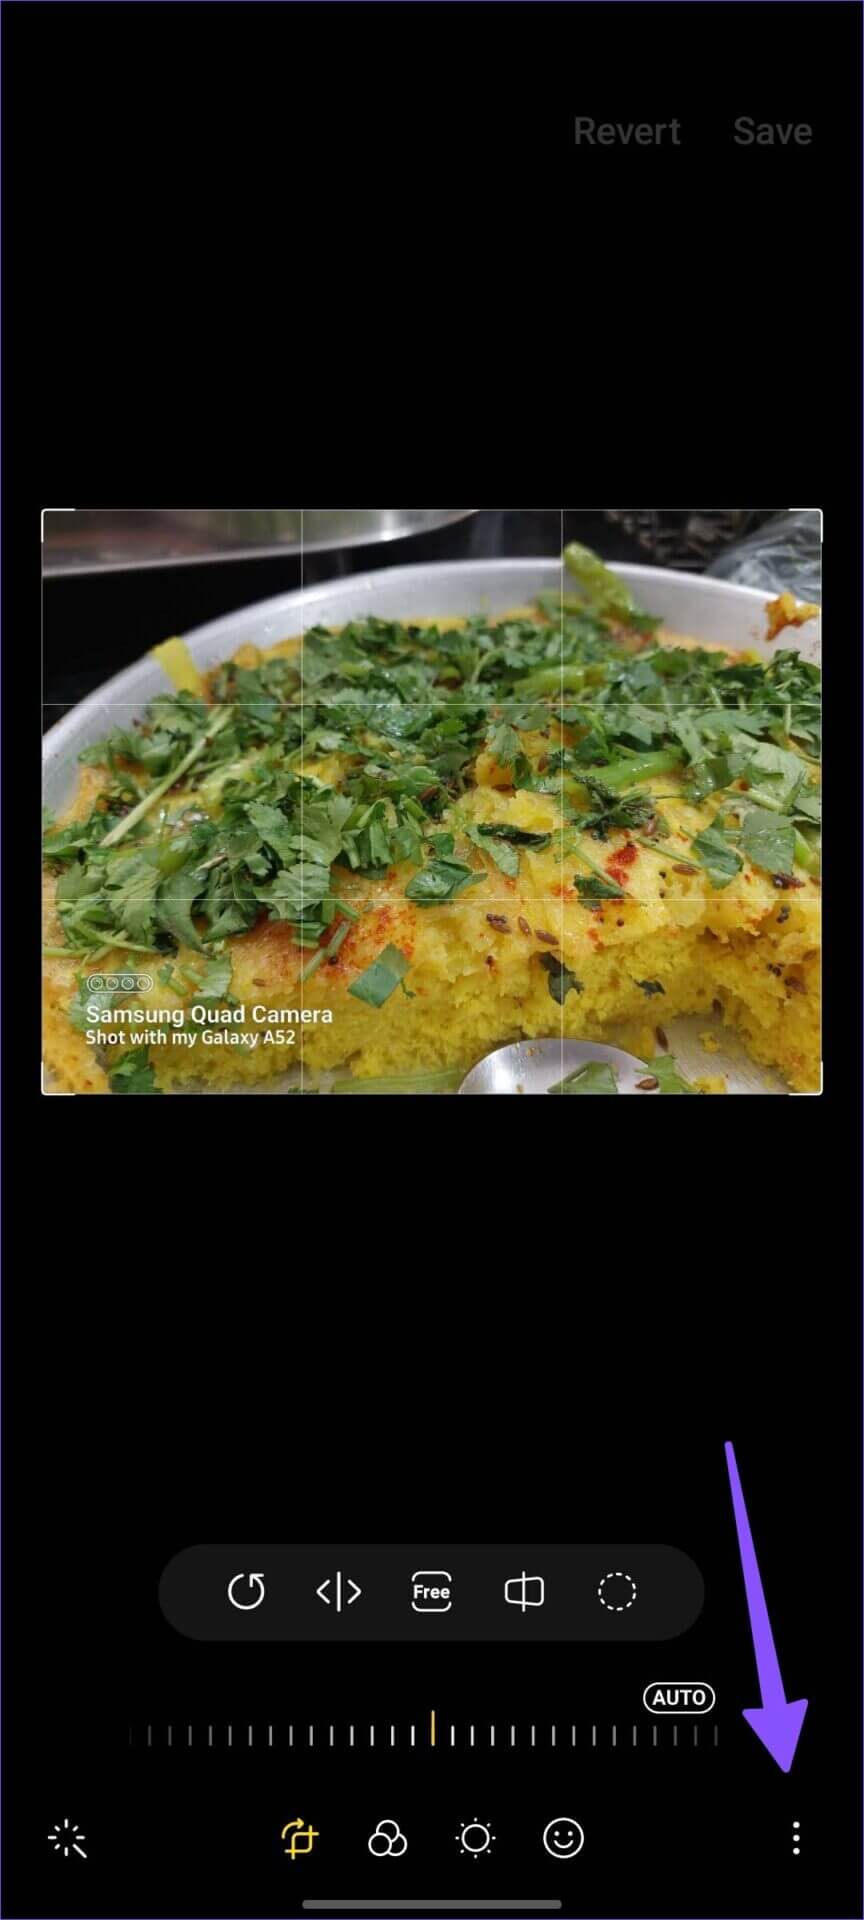
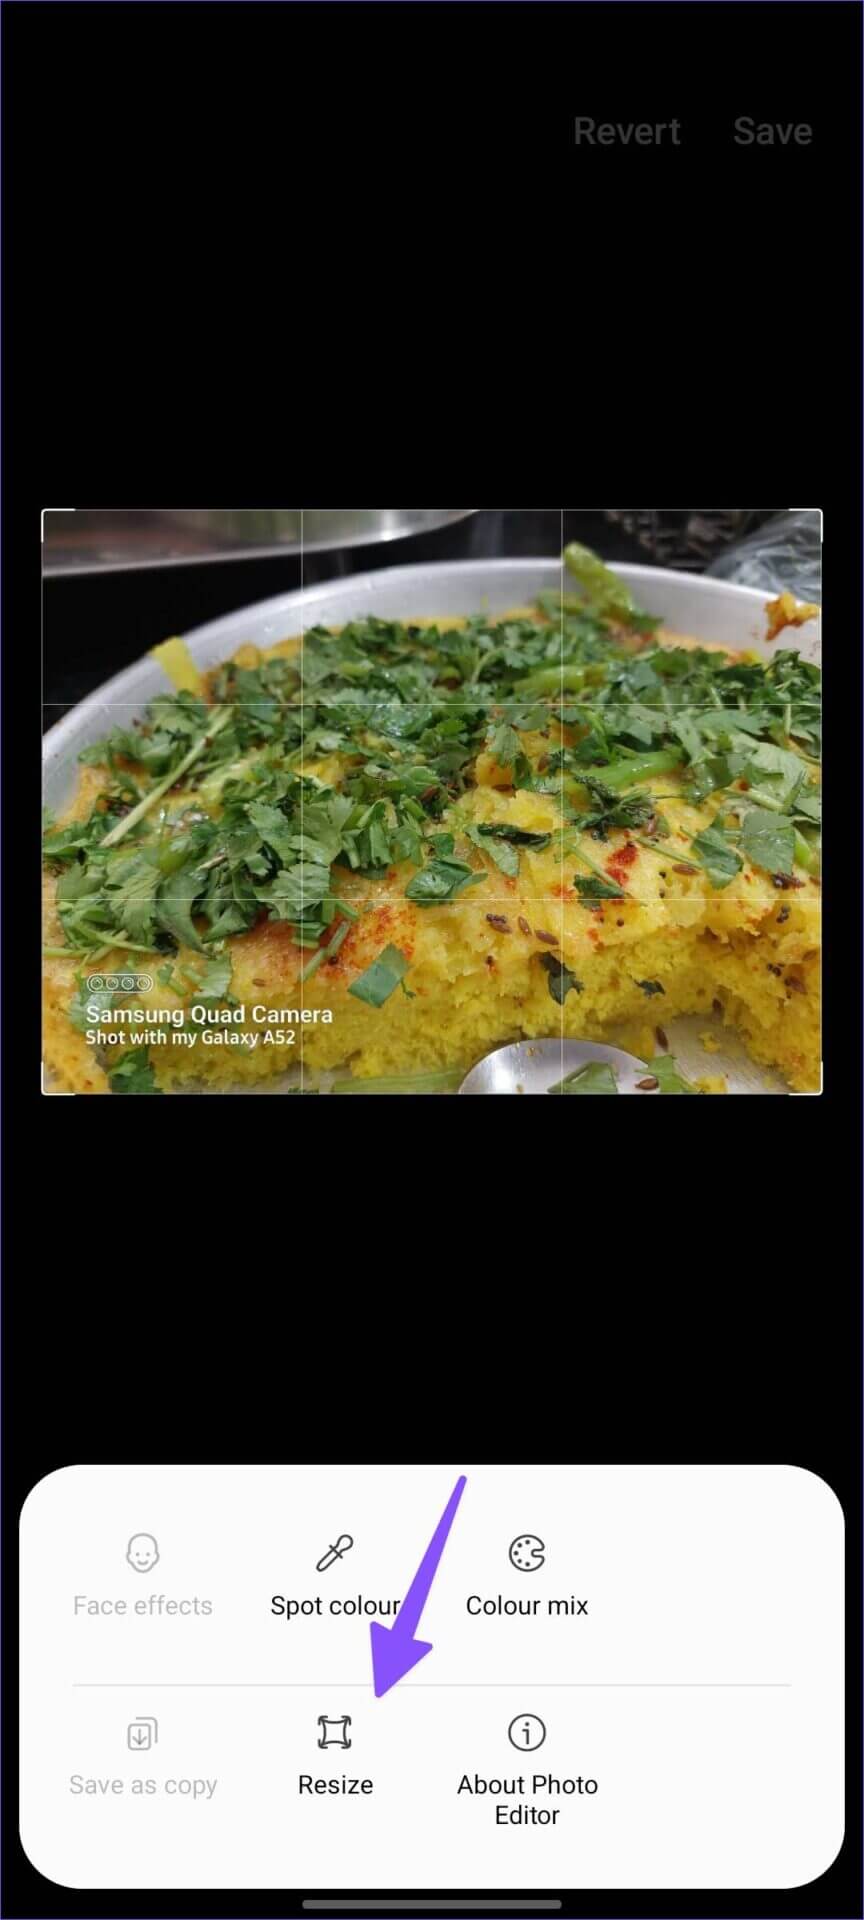
Step 4: Select the edit button at the bottom to open the image editor.
Step 5: Tap the three-dot menu in the bottom-right corner and select Resize.
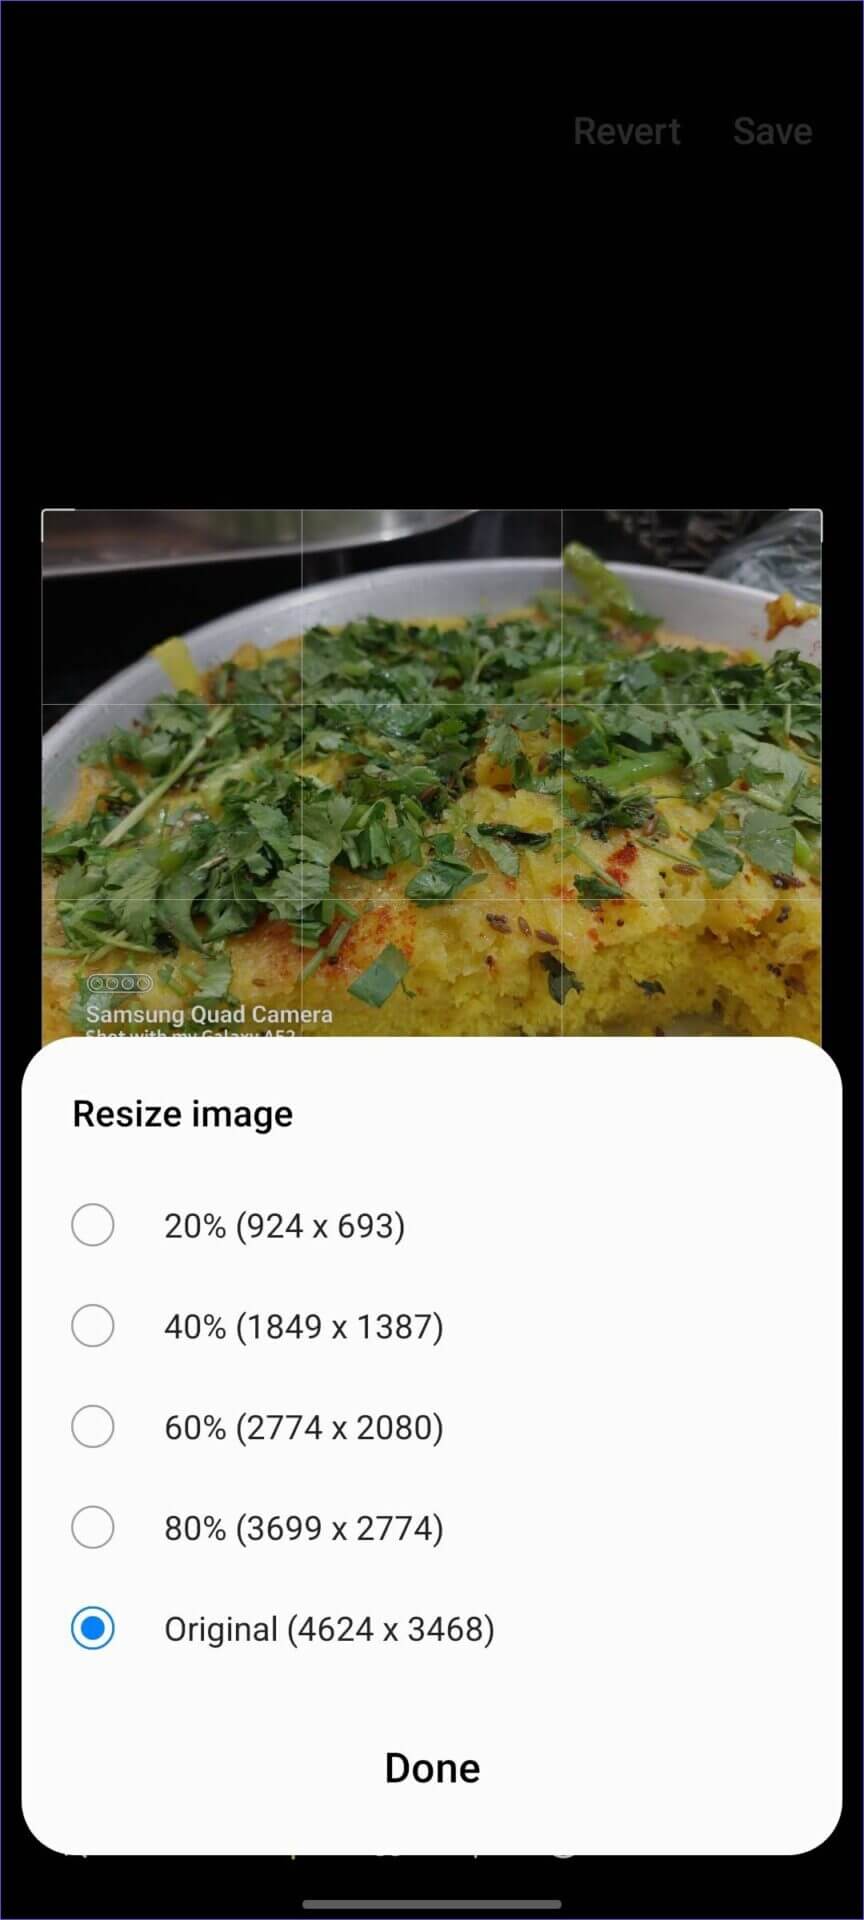
Step 6: You can reduce photo size by 20%, 40%, 60%, or 80%.
Step 7: Tap on a radio button beside your preferred size and tap Done.
Step 8: Hit the Save button in the top right corner and check the reduced image size (refer to the steps above).
iPhone
iPhones currently do not have a built-in feature to resize photos after they’ve been taken (unlike Android phones) unless you use a third-party app. However, a commonly suggested workaround is to email the photo to yourself. After selecting “Send,” a dialogue box will appear, allowing you to resize the image.
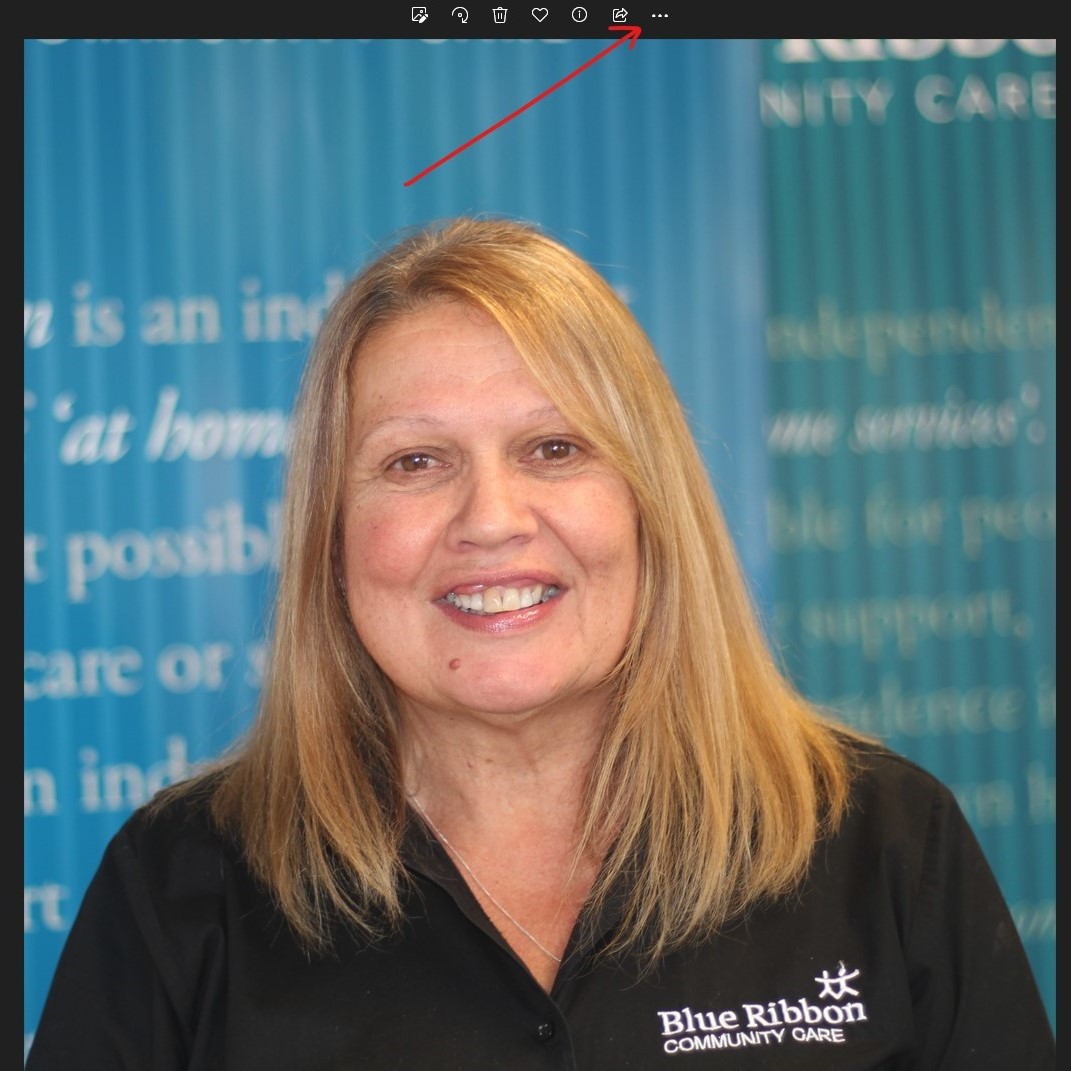
Open the photo that you want to resize in the Photos app.
Tap the share icon at the bottom of the screen.
Tap the Mail app.
Type your own email address into the recipient field.
Tap the Send arrow.
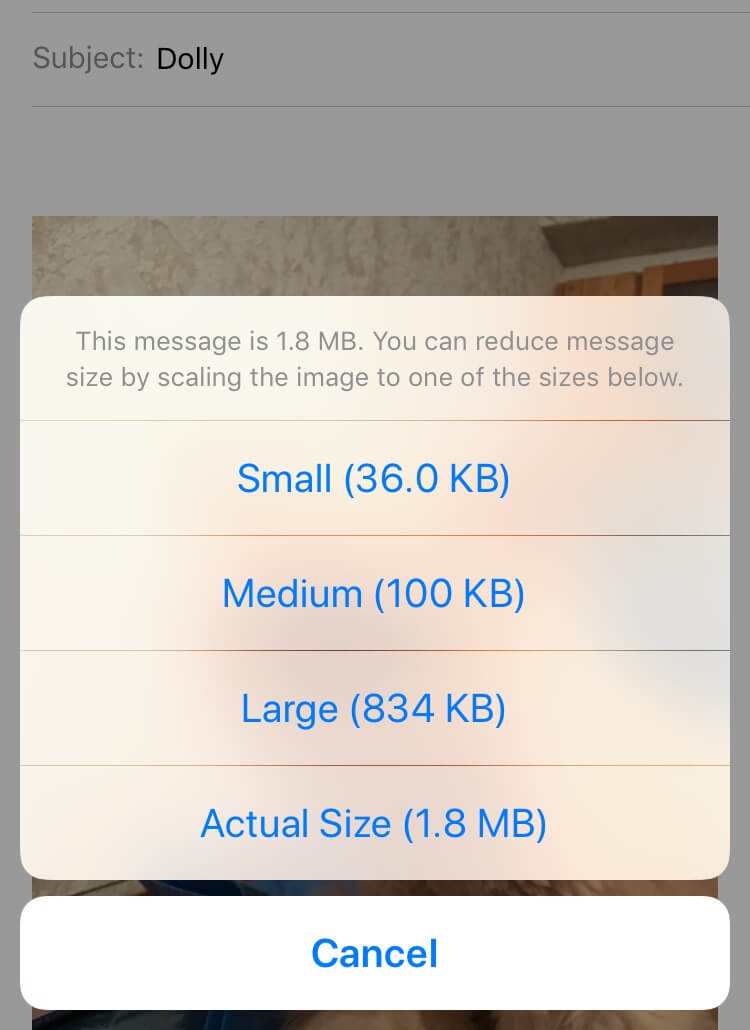
Choose the file size you want to use from the pop-up menu.
Once you choose the file size, the photo will be sent automatically. Once you receive your photo via email, you can save it to your photo library, or forward it to another recipient.
Windows
How to resize an image using the Photos app
The Photos app is probably the easiest way you can resize any image you want to. It’s very quick and simple, assuming you just want to resize a couple of images. Here’s what you need to do:
Step 1: Open the image you want to resize using the Photos app.
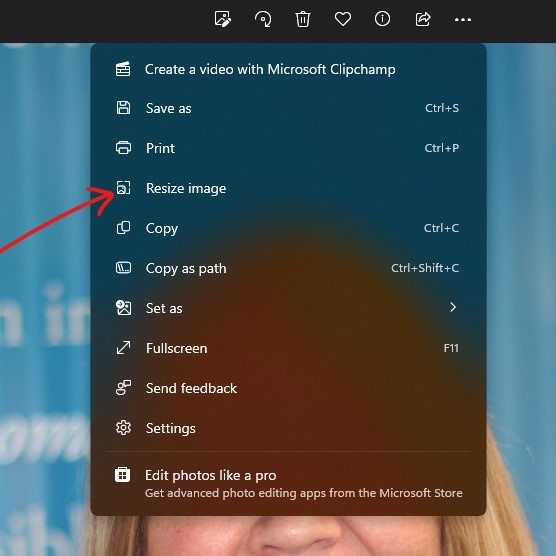
Step 2: Click the ellipsis button on the menu bar at the top, the click Resize.
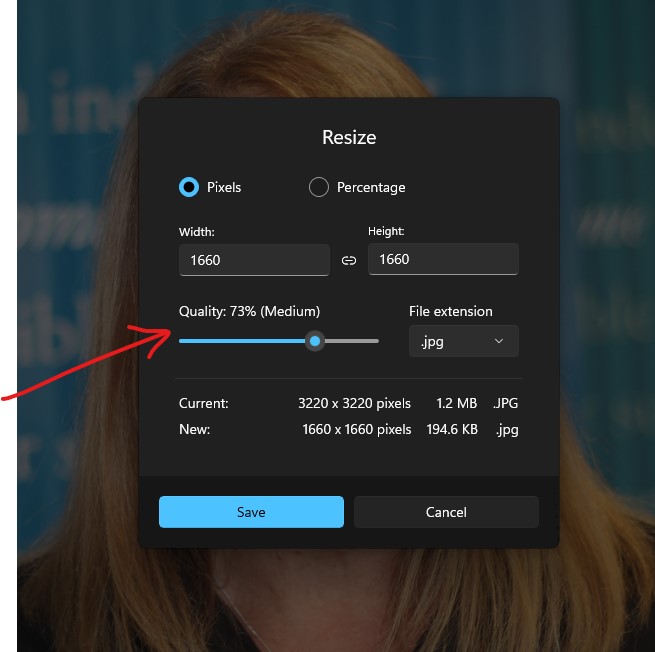
Step 3: First thing you can do is reduce the Pixel size. If you are uploading a profile picture you can most likely reduce the pixels by 50%. So in theis example the Pixel width will go from 3220 to 1610. You will notice that the file size has now reduced. In this example that’s from 1.2MB to 231.5KB
Step 4: We still need to get it down to 200KB so we can move the image quality slider to the left. In this example we only had to slide it from 80% to 73% to get 200KB.
Step 5: Click save and choose the destination folder.
Step 6: Now when you go to upload the Users profile picture you won’t see the file size limit warning.
Step 7: You will have to play about with this as your original image may not be the same size as this example, you might need to reduce pixels even further if it’s a larger file.
TinyPNG
You could also try TinyPNG.
This is a very simple piece of software where you upload your picture on the web and it is compressed automatically. You can also convert the image file type.